MANAGE | Sep 10, 2021
Quick Start Guide
Overview
There's a lot you can do with the MoneyWise app. Here are three simple steps to help you get started.
Step 1: Create Accounts
There are two types of accounts in the MoneyWise app - manual and connected. Manual accounts require you to manually input the account balance and track your expenses. Connected accounts are securely connected to your actual bank account and automatically import your balances and transactions. Connected accounts are only available in MoneyWise Pro, which you can try free for 14 days.
Manual Accounts
Manual accounts require you to manually input the account balance and track your expenses. If you decide to use the Basic version of MoneyWise, we recommend creating accounts that align with your actual bank accounts. This will help you quickly identify discrepancies between the MoneyWise app and your checking account. For instance, if the MoneyWise app shows your checking account balance as $1,000 but when you log into your banking account it is $800, you know there is a disconnect and you can begin to look for missing transactions or any other errors.

How to set up Manual Accounts
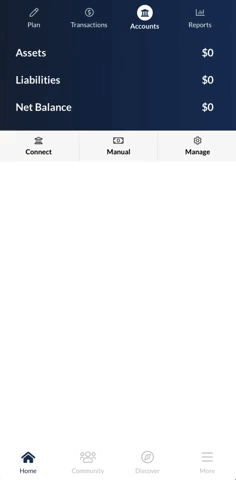
- From the Home screen slide the top menu to the left and select the Accounts tab.
- Choose the option for “Manual.”
- Give your account a name. For example, “Cash” or “Chase Checking.”
- Add the current dollar amount of your account’s balance.
- Choose the appropriate Account Type.
- Select “Save.” Your account will be created.
Connected Accounts
Connected accounts securely connect to your actual bank account(s), which automatically imports your balances and transactions. These types of accounts are only available in MoneyWise Pro, which you can try free for 14 days.
How to set up Connected Accounts (Pro Only)
- From the Home screen slide the top menu to the left and select the Accounts tab.
- Choose the option for “Connect.”
- Select “Get Started” on the screen introducing Plaid.
- Search for your financial institution and select it.
- Login to your bank account and follow the prompts.
- Select the account(s) you want to connect to MoneyWise.
- If you are having problems connecting to your institution or if you cannot locate your institution please email us at support@moneywise.org.
Note: Capital One does not currently support connections made via Plaid. Please contact Capital One to request this functionality be restored.
Step 2: Create & Fund Envelopes
Once you've created your accounts, either manually or by connecting them to your bank, it's now time to start allocating money from your accounts into your envelopes.
Creating Envelopes
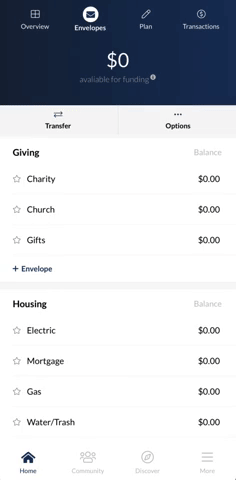
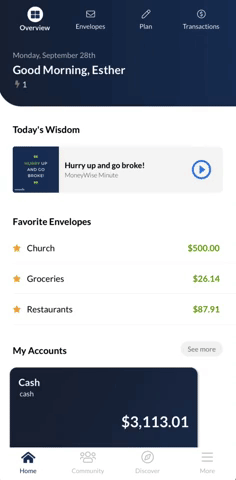
From the Home screen, navigate to the Envelopes tab at the top of the screen. You'll see we have given you some commonly used envelopes to get started, but you can easily add or delete envelopes to make the app fit your needs.
How to create new envelopes and envelope groups
To add new envelopes simply click on the "+ Envelope" button on the bottom left corner of each envelope group. To add new envelope groups, scroll to the bottom of the Envelopes or Plan screen and click "+ New Envelope Group"

Funding Envelopes
Your envelopes are essentially "sub accounts" that allow you to split a larger sum of money into smaller pieces. You won't be moving actual money from your accounts into the envelopes; it's simply an accounting exercise to show you how you would like to use the money in your "Available for Funding" to fund your envelopes.
How to fund envelopes
There are two ways to fund your envelopes. On the main Envelopes screen, simply swipe the envelope you want to fund to the right and click the Fund button. The other option is to click on the envelope and you will see a grey button that says Fund in the middle left side of the screen.
Quick Fund: To quickly fund your envelopes simply click and drag the envelope to the left.

Fund Your Envelopes: To fund your envelopes, click on the Envelope name, then click "Fund" and complete the form with the funding amount, the date you would like it to fund, and the frequency. If you are a Pro user you can actually schedule the this envelope to fund automatically so you never have to worry about funding your envelopes again!
What if I don't have enough money in "available for funding" to fund all my envelopes?
It’s okay if you can’t fund all of your envelopes right away. Be sure to fund the most important envelopes with the money you do have and as soon as you get more money in your accounts you’ll be able to fund more envelopes.It may take some time to get all your envelopes funded, so be patient and stick with it!
How to adjust an envelope's funding
As you start to use your envelopes you will realize you either have too much or too little money in an envelope. If you run across this scenario you can either:
- Transfer money between envelopes by taking some of the money in one envelope and transferring it to another envelope.
- Fund the envelope with money in "Available for Funding."
- Edit a previously created funding item by adjusting the amount either up or down.
Step 3: Categorize Transactions
How to Assign Imported Transactions
If you are a MoneyWise Pro user, you can connect your bank accounts for automatic transaction imports. We'll even let you know when you have unassigned transactions and will remember where you assign them so they will be automatically categorized for you in the future! It's pretty awesome- and we even give you the flexibility to tell us which transactions you don't want us automatically assigning to envelopes.
Quick Assign Transactions: Click and hold the transaction to enable a menu of envelopes, then click on the appropriate envelope to categorize the transaction.
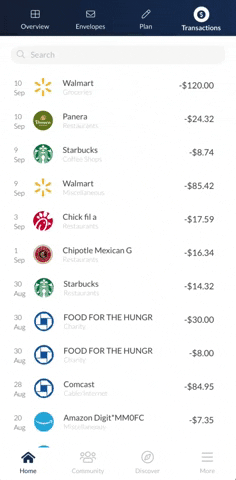
Assign Transactions: Click on the transaction, then select the appropriate envelope to categorize the transaction. You can also modify the date and description. You can't delete transactions or modify the amounts of transactions imported from your connected accounts. Doing so would cause major problems with the accuracy of the accounting.

If you are a MoneyWise Basic user, you will need to manually track your transactions (see below). We figure this is a good time to let you know you can try MoneyWise Pro for 14 days free and see how much easier things are when the app does the work for you 😁
How to Manually Track Transactions
Tracking transactions manually is an option for Basic or Pro app users. To add a transaction manually, follow these steps:
Create Manual Transactions from an Envelope
- Go to the envelope that you want to use to organize the transaction.
- Select the "+" option in the "Activity" section.
- Give the transaction a name, enter the dollar amount, select if it's an income or expense and the appropriate account.
- Save the transaction.
Create Manual Transactions from an Account
- Select the account the transaction was made with (ie., checking, cash, etc.).
- Select the "+" to the right of the title "Transactions."
- Give the transaction a name, enter the dollar amount, select if it's an income or expense and the appropriate envelope.
- Save the transaction.
What's Next?
Congratulations on making it this far! Once you've mastered the three steps above, it's time to get to work on your Plan, which helps you plan out how you want to fund your envelopes throughout the month. Creating your Plan is a big deal and deserves its own guide, which you can find here: Create & Use Plans.